A quick tutorial in how to recover 3D information from your favourite 3D movies.
In this example, we'll be using Star Wars - The Last Jedi.
tl;dr? Here's the end result (this video is silent):
Let's go!
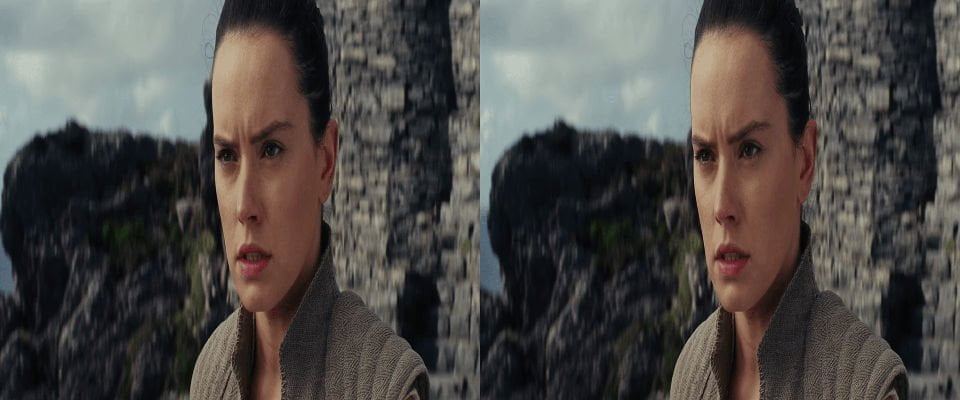
Take a screenshot of your favourite scene. Something with a clearly defined foreground and background. The brighter the image the better the results.

Split the image in two:
mogrify -crop 50%x100% +repage screenshot.png
As you can see, 3D movies compress the image horizontally. The separated screenshots will need to be restored to their full width.
mogrify -resize 200%x100% screenshot-*.*
The next step involves a little trial-and-error. Generating a depth map can be done in several ways and it takes time to find the right settings for a scene.
Here's a basic Python script which will quickly generate a depth map.
import numpy as np
import cv2
from matplotlib import pyplot as plt

leftImage  = cv2.imread('screenshot-0.png',0)
rightImage = cv2.imread('screenshot-1.png',0)

stereo = cv2.StereoBM_create(numDisparities=16, blockSize=15)
disparity = stereo.compute(leftImage,rightImage)
plt.imshow(disparity,'gray')
plt.show()
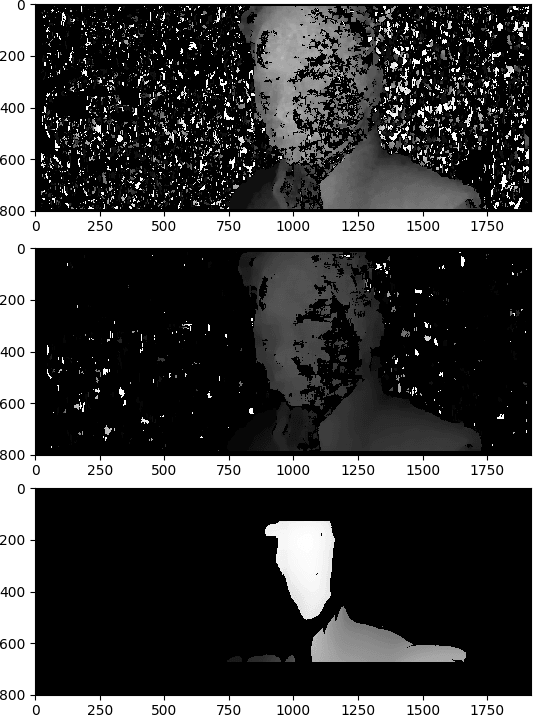
Depending on the settings used for numDisparities and blockSize, the depth map will look something like one of these images.

In these examples, lighter pixels represent points closer to the camera, and darker pixels represent points further away. Optionally, you can clean up the image in your favourite photo editor.
The next step is to create three-dimensional mesh based on that depth, and then paint one of the original colour images onto it.
I recommend the excellent pyntcloud library.
In order to speed things up, I resampled the images to be 192*80 - the larger the image, the slower this process will be.
import pandas as pd
import numpy as np
from pyntcloud import PyntCloud
from PIL import Image
Get the colour image. Convert the RGB values to a DataFrame:
colourImg    = Image.open("colour-small.png")
colourPixels = colourImg.convert("RGB")
Add the RGB values to the DataFrame with a little help from StackOverflow.
colourArray  = np.array(colourPixels.getdata()).reshape((colourImg.height, colourImg.width) + (3,))
indicesArray = np.moveaxis(np.indices((colourImg.height, colourImg.width)), 0, 2)
imageArray   = np.dstack((indicesArray, colourArray)).reshape((-1,5))
df = pd.DataFrame(imageArray, columns=["x", "y", "red","green","blue"])
Open the depth-map as a greyscale image. Convert it into an array of depths. Add it to the DataFrame
depthImg = Image.open('depth-small.png').convert('L')
depthArray = np.array(depthImg.getdata())
df.insert(loc=2, column='z', value=depthArray)
Convert it to a Point Cloud and display it:
df[['x','y','z']] = df[['x','y','z']].astype(float)
df[['red','green','blue']] = df[['red','green','blue']].astype(np.uint)
cloud = PyntCloud(df)
cloud.plot()
Result
Here's the 192*80 image converted to 3D, and displayed in the browser:
Wow! Even on a scaled down image, it's quite impressive. The 3D-ness is highly exaggerated - the depth is between 0-255. You can either play around with image normalisation, or adjust the values of z by using:
df['z'] = df['z']*0.5
The code is relatively quick to run, this is the result on the full resolution image. The depth is less exaggerated here, although I've multiplied it by 5.
Creating Meshes
For quick viewing, PyntCloud has a built in plotter suitable for running in Jupyter. If you don't have that, or want something higher quality, viewing 3D meshes is best done in MeshLab.
PyntCloud can create meshes in the .ply format:
cloud.to_file("hand.ply", also_save=["mesh","points"],as_text=True)
Better Depth Maps
The key to getting this right is an accurate depth mapping. That's hard without knowing the separation of the cameras, or being able to meaningfully calibrate them.
For example, from this image:

We can calculate a basic depthmap:

Which gives this 3D mesh:
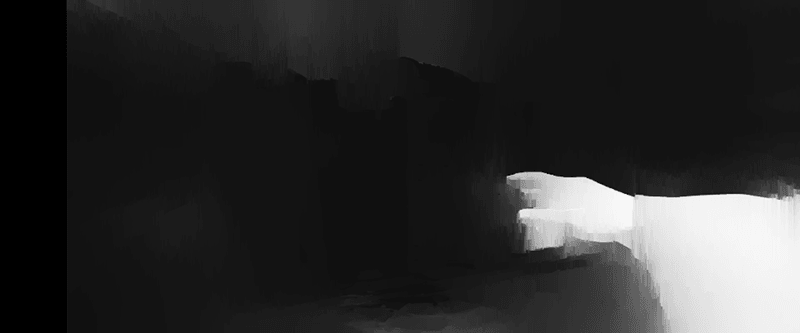
If you use a more complex algorithm to generate a more detailed map, you can get some quite extreme results.
Depthmap Code
I'm grateful to Timotheos Samartzidis for sharing his work.
import cv2
import numpy as np
from sklearn.preprocessing import normalize

filename = "screenshot"

img_left  = cv2.imread(filename+'-1.png')
img_right = cv2.imread(filename+'-0.png')

window_size = 15

left_matcher = cv2.StereoSGBM_create(
    minDisparity=0,
    numDisparities=16,
    blockSize=5,
    P1=8 * 3 * window_size ** 2,
    P2=32 * 3 * window_size ** 2,
    # disp12MaxDiff=1,
    # uniquenessRatio=15,
    # speckleWindowSize=0,
    # speckleRange=2,
    # preFilterCap=63,
    # mode=cv2.STEREO_SGBM_MODE_SGBM_3WAY
)

right_matcher = cv2.ximgproc.createRightMatcher(left_matcher)

wls_filter = cv2.ximgproc.createDisparityWLSFilter(matcher_left=left_matcher)
wls_filter.setLambda(80000)
wls_filter.setSigmaColor(1.2)

disparity_left  = left_matcher.compute(img_left, img_right)
disparity_right = right_matcher.compute(img_right, img_left)
disparity_left  = np.int16(disparity_left)
disparity_right = np.int16(disparity_right)
filteredImg     = wls_filter.filter(disparity_left, img_left, None, disparity_right)

depth_map = cv2.normalize(src=filteredImg, dst=filteredImg, beta=0, alpha=255, norm_type=cv2.NORM_MINMAX);
depth_map = np.uint8(depth_map)
depth_map = cv2.bitwise_not(depth_map) # Invert image. Optional depending on stereo pair
cv2.imwrite(filename+"-depth.png",depth_map)
As good as this code is, you may need to tune the parameters on your images to get something acceptable.
More models!
Here are a few of the interesting meshes I made from the movie. Some are more accurate than others.
Snoke's Head
Throne Room Battle
V-4X-D Ski Speeders
Kylo Ren's TIE Fighter Guns
Is TLJ really 3D?
Nope! The movie was filmed with regular cameras and converted in post-production.
As I've discussed before, The Force Awakens has some scenes which have some reasonable 3D, but it wasn't a great conversion. I think TLJ is done much better - but I wish the CGI was properly rendered in 3D.
Much of the 3D-ness is one or two foreground elements floating against a background. If you want real 3D models, you need something shot and edited for 3D - for example this Doctor Who 3D special:
Further Reading
Getting this working took me all around the interwibbles - here are a few resources that I used.
- Callibration of stereo cameras
- Epipolar Geometry and Depth Map from stereo images
- Disparity of stereo images with Python and OpenCV
- Optimizing point cloud production from stereo photos by tuning the block matcher
- Calculating a depth map from a stereo camera with OpenCV
- 3D Object Reconstruction using Point Pair Features
- Dr. Jürgen Sturm's "Generate Pointcloud"
Copyright
Star Wars: The Last Jedi is copyright Lucasfilm Ltd.
These 6 screenshots fall under the UK's limited exceptions to copyright.
Any code I have written is available under the BSD License and is available on GitHub.
3 thoughts on “Reconstructing 3D Models from The Last Jedi”
Nice! Gosh, there really is a lot of stuff in OpenCV I haven't yet discovered!
sathya
Thanks for the article. Is it possible to construct 3d object from Normal maps ? Kindly provide details , if yes.
You need two images - stereo - in order to reconstruct depth information easily. For anything else, you need the "magic" of AI.
What links here from around this blog?