(I think I'm the first person to try this - so I decided to document the process.)
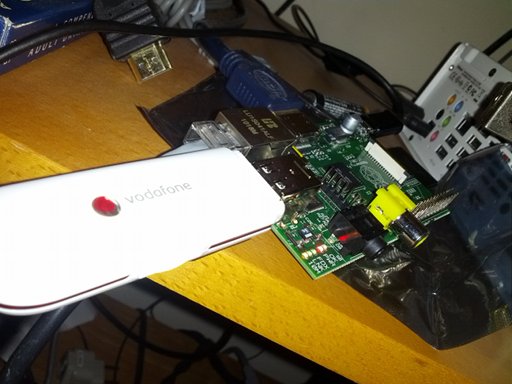
A few weeks ago, I won a Raspberry Pi at the #OTA12 hackday. It arrived on Friday, so I thought I would turn it into an SMS server using the incredible FrontlineSMS.
0. Setting up the Pi
This is the easy part. Follow the excellent guide on the eLinux wiki. Essentially, download the Debian image, extract, and dd it onto an SD card.
The hardest part was finding a full sized SD! In the end, I found an old adapter and stuck in a 2GB micro SD card.
1. First Boot
My first boot was a failure. Nothing appeared on the screen. So, I switched off the power, unplugged every lead, plugged them back in, and powered it on. Success!

The first thing I did was ensure the operating system was up to date.
Check for updates:
sudo apt-get update
Then, apply those updates
sudo apt-get upgrade
This took a few minutes.
Finally, set up SSH or VNC if you plan on using the machine remotely.
2. Dongle Hardware
FrontlineSMS maintains a list of USB dongles which work with its service. I used a Vodafone branded Huawei E220. Sold as Vodafone K3565
 The Raspberry Pi only has 2 USB slots - the dongle was slim enough not to interfere with the other USB cable, but it did mean I could only run either a keyboard or a mouse without using a hub. It's recommended that you use a powered USB hub - although my keyboard and mouse didn't seem to draw too much power.
3. Frontline SMS
Downloading Frontline SMS via the commandline (using v1.6 because v2 isn't ready for Linux yet)
wget http://frontlinesms.com/download/secure/FrontlineSMS-distribution-1.6.16.3-linux_i686-dist.zip
Unzip
unzip FrontlineSMS-distribution-1.6.16.3-linux_i686-dist.zip
Run
cd FrontlineSMS-distribution-1.6.16.3
./FrontlineSMS.sh
Gave an error - FrontlineSMS requires Java.
4. Installing Java
The Java install takes about 140MB of disk space. After downloading and extracting FrontlineSMS, I only had about 220MB of free space. I deleted the FrontlineSMS zip file and had 234MB free. Just about enough room!
sudo apt-get install openjdk-6-jdk
Wait several minutes and you'll be good to go.
5. Running for the First Time
Frontline SMS requires a GUI.
Running a GUI is as easy as typing
startx
The resolution was set at the slightly odd dimensions of 1264*672 - which meant there was a large black border around the screen.

Open a terminal (Start, Accessories, LXTerminal, then type
cd FrontlineSMS-distribution-1.6.16.3
./FrontlineSMS.sh
After several minutes of waiting, FrontlineSMS started!

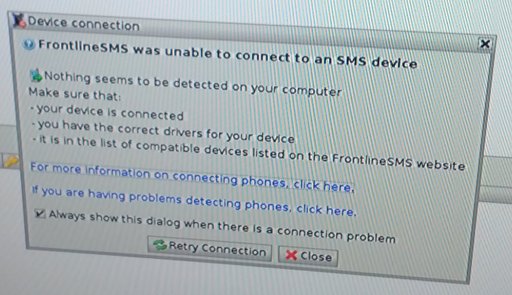
However, no matter what I tried, I couldn't get FrontlineSMS to detect the dongle. The OS could see it fine (using "lsusb" and "dmesg"), but it just didn't appear to be detected by FrontlineSMS.

A delve into the commandline, showed this error:

librxtxSerial.so: cannot open shared object file: No such file or directory
(Possible cause: can't load IA 32-bit .so on a ARM-bit platform)
thrown while loading gnu.io.RXTXCommDriver
6. Installing the Correct Libraries
We need to load the correct (ARM) version of rxtx.
sudo apt-get install librxtx-java
Find where the install process has dumped it
find . -name "librxtxSerial.so"
It should show you two location - the first being where the correct version is, the second where the FrontlineSMS version is.
./usr/lib/jni/librxtxSerial.so
./home/pi/Desktop/FrontlineSMS-distribution-1.6.16.3/librxtxSerial.so
All we need to do is overwrite the incorrect version.
cp /usr/lib/jni/librxtxSerial.so /home/pi/Desktop/FrontlineSMS-distribution-1.6.16.3/
Then, run
./FrontlineSMS.sh
And, after some warnings and waitings, you should see

Hey Presto! FrontlineSMS up and running on a Raspberry Pi!
(Oh! I finally worked out how to do screenshots! install scrot and run "scrot -d 10" to take a screenshot after 10 seconds.)
7. Manually Sending an SMS
Running FrontlineSMS via Java on a 700MHz ARM device is very slow. It is possible to talk directly to the dongle and manually tell it to send SMS.
First, I installed picocom.
sudo apt-get install picocom
To find out where the dongle has been installed, type:
dmesg
Which will give an long output, which should contain some text like this like this:
option 1-1.2:1.1: GSM modem (1-port) converter detected
usb 1-1.2: GSM modem (1-port) converter now attached to ttyUSB0
option 1-1.2:1.0: GSM modem (1-port) converter detected
usb 1-1.2: GSM modem (1-port) converter now attached to ttyUSB1
The dongle installs itself in two places - ttyUSB0 & 1. It's the first one we want.
Connect by issuing this command
picocom /dev/ttyUSB0 -b 115200 -l
Which will give you the output
port is        : /dev/ttyUSB0
flowcontrol    : none
baudrate is    : 115200
parity is      : none
databits are   : 8
escape is      : C-a
noinit is      : no
noreset is     : no
nolock is      : yes
send_cmd is    : ascii_xfr -s -v -l10
receive_cmd is : rz -vv

Terminal ready
From now on in, we're typing commands directly into the dongle. You cannot press the delete key! Copy & paste, or be careful when typing!
First, to make sure everything is working, we type
AT
We should see this response
OK
Next, set the dongle to text mode
AT+CMGF=1
Again, the response should be
OK
Let's send our first SMS!
AT+CMGS="+447700900123"
This will not say "OK", rather, it will prompt us to type a message
>
Type your message, so the screen looks like
> This is a test
DO NOT HIT ENTER. Instead, hit CTRL and Z at the same time.
You should see a response like
+CMGS: 193

OK
The number is the "sent items" reference. Within a few moments, the SMS should have been received.
You can send an SMS to the dongle. To check for messages, type the command
AT+CMGL="ALL"
You should see all the messages in the inbox
+CMGL: 0,"REC READ","+447700900000",,"12/06/19,13:53:19+04"
Received
+CMGL: 1,"REC READ","+447700900321",,"12/06/23,17:16:29+04"
Testing
+CMGL: 2,"REC UNREAD","+447700900555",,"12/06/23,23:27:48+04"
This is another test
To quit picocom, hold down CTRL, then hold down A, then hold down X.
Useful Links
A collection of links I found useful when writing this blog post
- http://designbuildtestrepeat.wordpress.com/2008/04/29/huawei-e220-on-linux-for-sms/
- http://www.diafaan.com/sms-tutorials/gsm-modem-tutorial/
- http://www.shapeshifter.se/2008/04/30/list-of-at-commands/
- http://raspberrypi.homelabs.org.uk/raspberrypi-the-arduino-development-tool/
- http://developer.vodafone.com/labs/opensource/linux- connection-manager/operating-systems/ubuntu-linux-setup/
- For unlocking Huawei modems
14 thoughts on “Raspberry Pi and Frontline SMS”
Did you try it with SMStools ? I'm looking for a way to do a cheap SMS to Web gateway to place in various locations around the world to accept SMS messages for access to a server.
garagedeveloper
Which vodafone sim are you using pay as you? contract or what. Ive had this dongle it can receive messages find i just cant send any. Vodafone say its barred.
svbito
This post came exacly in the right moment! I was researching ways to implement my own SMS-gateway via scripts and it popped up. Great writeup, I will try your instructions as soon as possible.
Brice
Hello, did you try to put Android on your Pi and install SMS Gateway app ? SMS Gateway allows you to send SMS by http request, just by getting http://x.x;x.x:9090/sendsms...phonenumber...text...password I'm really interested by a network SMS gateway, and the easiest way is getting SMS Gateway on a Android device, but don't want to buy an smartphone, and I search a small device like Pi running Android with GSM possibilities. I'm interested by your opinion on this idea.
I think you're probably better off buying a cheap Android phone. A Huawei Blaze is about £40 - including £10 PAYG credit. That's about the same price as Raspberry Pi and - while not as customisable - is perfect if you want a cheap and fast Android device.
Nick
Hi! I just tried this and thought it was going ok, replaced the librxtsSerial etc but then I get a mismatch java error on startup,
Native lib Version = RXTX-2.2pre2 Java lib Version = RXTX-2.1-7 WARNING: RXTX Version mismatch Jar version = RXTX-2.1-7 native lib Version = RXTX-2.2pre2
Did you get this when you did it!!??
Lars
Mismatch is just a warning. Start Fronline graphically under x. It should work.
Lars
I can't fix the problem you described "A delve into the commandline, showed this error:"
Followed all the steps but still getting the same error. It freaks me out to fail that short of the finish.
Help appreciated.
Lars
I got it working!
Adel
any ideas on the vodafone newer K3770 models? when i dmesg i dont see any modems listed, but i see the usb module listed? i was trying the 2nd approach (since i dont have java installed on my pi - im using the Raspbian “wheezy”).
aryeh
wget http://frontlinesms.com/download/secure/FrontlineSMS-distribution-1.6.16.3-linux_i686-dist.zip not found , is something wrong with the link ? can you put up a new one please?
The download can be found at http://www.frontlinesms.com/downloads/FrontlineSMS-distribution-1.6.16.3-linux_x86_64-dist.zip
Danielle Murray
Hello, I noticed the comments above are quite old but still give it a go. I have just installed sakis3g and followed all the steps necessary for connecting a SIM800 board to my Raspberry Pi2B. When I run sakis3g to connect to network I press Connect 3G, then Custom tty but I do not get a list of APNs. I am on Three UK, put that in with/without UK but no luck.I can't seem to get connected, this is the steps that prevents me from connecting. Any ideas? Thanks in advance.
I suggest asking at https://www.raspberrypi.org/forums/
As you say, this post is 7 years old - so my knowledge is quite out of date.
What links here from around this blog?