Building the ultimate Xbox Server

I've been playing around with Linux on the Xbox for a while. I finally decided to stop piddling about with the stock drive and create a fully featured network server. I shall call this beast.... The xNAS!
While doing this, I found a lot of badly presented and conflicting information. This is my attempt to right that wrong. I've attempted to add some of these steps to the Wiki, but it's not accepting changes at the moment.
This tutorial assumes you are using Xebian and an original Xbox.
The Aim:
Build a headless Linux server with 1.5TB storage space, Bit Torrent, Samba Sharing and other stuff.
Kit you will need.
- A chipped Xbox. This is a bit of a cop out. There are many excellent tutorials around on how to chip an Xbox. If you're not comfortable soldering around your Xbox - you can buy pre-chipped ones on eBay or the AVForums.
- Some large IDE hard drives. The Xbox will take a maximum of 2 IDE devices. The largest drive I could find were 750GB each. You may be able to go larger using a SATA/PATA converter.
- An ATA power Y-splitter. The Xbox's DVD drive has a proprietary power connector. You'll need a splitter if you want to power more than 1 HDD.
- A set of torx screw drivers
- Nerves of steel!
So... Let's begin.
I chose Xebian Linux because it's based on Debian. This means that all the packages are very well maintained. You should get a large range of programs with frequent security updates. The Xebian Basic distribution (which we'll be using) doesn't give you a GUI. You get command line access only. It might be a bit scary - but it keeps everything running quickly on the Xbox's modest hardware.
There is an excellent tutorial on the Xbox Linux Wiki. However, some of the information is out of date.
Here's what you need to do.
- Download the latest version of Xebian Basic.
- Burn the ISO on to a CD or DVD that you are sure your Xbox will read.
- Remove the Xbox's original HDD - replace with your massive HDD.
- Boot using the Cromwell BIOS (or other method to boot unsigned content).
- Select the DVD drive.
- Linux will now boot! Hurrah!
This is the point of no return. Once these next few steps are complete, your Xbox will be a Linux machine. You will not be able to play Xbox games on it.
- Type
XBOXLinuxInstall - Linux will start installing.
- You will want to choose Option 3. This will take over the whole disk for Linux.
- Answer the questions as they arise (set the IP address etc).
- You can now remove the DVD drive (with the power off!) and replace it with another HDD.

You are now, technically, done. Xebian is installed. You (almost) have an xNAS. However, it is not (currently) very useful.
There are two things we need to do to get this Xbox in a usable state.
Set up the DNS.
By default, Xebian points to an outdated DNS entry. You will want to modify this to point to your DNS server.
Type nano /etc/resolv.conf
This opens the file in the nano editor. This is a very simple editor - much easier to use than emacs or vi.
Edit it to say
nameserver 208.67.222.222
nameserver 208.67.220.220
The IP addresses there point to the OpenDNS Servers - perfect if your ISP is a bit poor at providing a DNS service or you're going to be changing your network configuration frequently.
Edit the update sources.
Because Xebian is based on Debian, we can update it in the same way as we would a normal Debian system.
Unfortunately, Xebian uses a rather outdated sources.list (the file which tells Xebian where to look for updates).
Luckily, it is very easy for us to update this!
First, go to http://www.debian.org/mirror/list and find your nearest mirror. So, if you're in the UK, choose ftp.uk.debian.org/debian/
For this example, we'll be using nano - feel free to use your favourite text editor.
To open the sources file, type
nano /etc/apt/sources.list
You should see a file which looks like this
deb http://ftp.at.debian.org/debian stable main contrib non-free
deb http://non-us.debian.org/debian-non-US stable/non-US main contrib non-free
deb-src http://non-us.debian.org/debian-non-US stable/non-US main contrib non-free
deb http://security.debian.org stable/updates main contrib non-free
deb-src http://security.debian.org stable/updates main contrib non-free
Replace it with a file that looks like this (substitute your nearest mirror)
deb http://ftp.uk.debian.org/debian stable main contrib non-free
deb http://ftp.uk.debian.org/debian stable main contrib non-free
deb-src http://ftp.uk.debian.org/debian stable main contrib non-free
deb http://security.debian.org stable/updates main contrib non-free
deb-src http://security.debian.org stable/updates main contrib non-free
Save the file and exit.
Updating is a three step process.
- To get a list of updates, type
apt-get update - To upgrade to the latest version, type
apt-get upgrade- (You may need to answer some questions from the upgrader - if you don't know what you're doing, accept the default option.)
- Finally, to upgrade to the latest distribution, type
apt-get dist-upgrade
That's it - you have upgraded successfully!
Whenever you want to check for updates, type apt-get update
Then apt-get upgrade
Tada! All done!
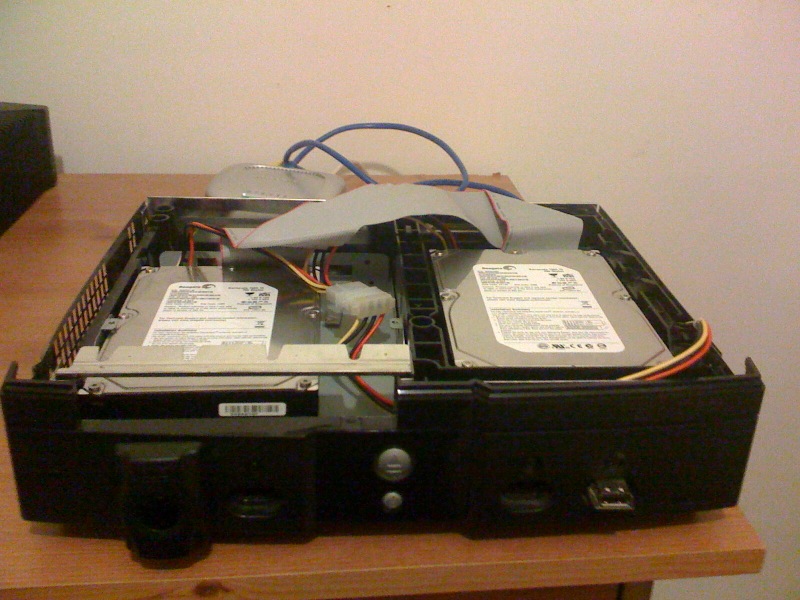
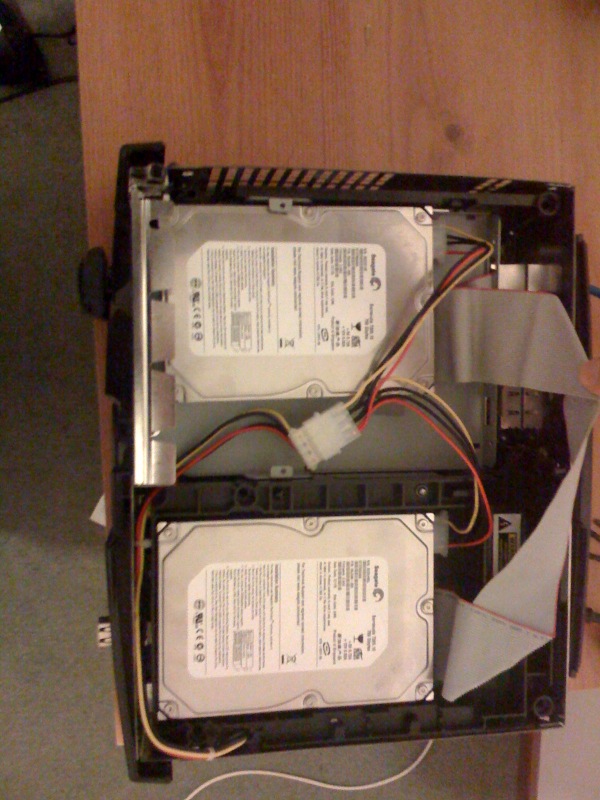
Here she is in all her glory

Up next - setting it up for Samba, Bit Torrent and other fun stuff.
 iplayer-dl on Xbox Xebian
 Raspberry Pi Zero Hidden In An Xbox Controller
gary says:
Do you plan on putting up new information about the setup process after the initial install of Xebian?
Manuel says:
Geza says:
I am writing from my new/old server, I just finished installing Ubuntu Desktop on it. It is an interesting experience.
I searched through your blog archive and I found 2 Jedi masters and no information.
Here's my problem and I would like to ask if you have a solution:
I take tens to hundreds of pictures and videos every day with my phone/camera. I am a HGV driver not a photographer. All these pictures/videos are taking up space in my Google cloud and it is coming close to full. The next level is to pay even more for cloud storage. I have some spare time on my hands these days like everyone else and I was wandering if there is a simple solution to a network attached storage under Ubuntu for pictures and videos. I am also using DavinciResolve 16 on my laptop and I would like to have fast access to those video files stored on a nas. Access from outside my home network would be a bonus but not crucial.
This machine runs on an Supermicro X7DAL-E dual xenon motherboard with 16GB of ram 10-13 years old.
Any advice would be appreciated.
How do you store all your pictures/videos??
Geza says:
I'll try to install NextCloud on my ubuntu machine.