If you've spent any time using Linux, you'll be used to installing software like this:
The README says to download from this link. Huh, I'm not sure how to unarchive .tar.xz files - guess I'll search for that. Right, it says run
setup.shhmm, that doesn't work. Oh, I need to set the permissions. What was thechmodcommand again? OK, that's working. Wait, it needssudo. Let me run that again. Hang on, am I in the right directory? Here it goes. What, it crapped out. I don't have some random library - how the hell am I meant to install that? My distro has v21 but this requires <=19. Ah, I also need to upgrade something which isn't supplied by repo. Nearly there, just need to compile this obscure project from SourceForge which was inexplicably installed on the original dev's machine and then I'll be good to go. Nope. Better raise an issue on GitHub. Oh, look, it is tomorrow.
As a developer, you probably don't want to answer dozens of tickets complaining that users are frustrated with your work. You thought you made the README really clear and - hey! - it works on your machine.
There are various solutions to this problem - developers can release AppImages, or Snaps, or FlatPaks, or Docker or whatever. But that's a bit of stretch for a solo dev who is slinging out a little tool that they coded in their spare time. And, even those don't always work as seamlessly as you'd hope.
There's an easier solution:
- Follow the steps in your README
- See if they work.
- …
- That's it.
OK, that's a bit reductive! There are a million variables which go into a test - so I'm going to introduce you to a secret zeroth step.
- Spin up a fresh Virtual Machine with a recent-ish distro.
If you are a developer, your machine probably has a billion weird configurations and obscure libraries installed on it - things which definitely aren't on your users' machines. Having a box-fresh VM means than you are starting with a blank-slate. If, when following your README, you discover that the app doesn't install because of a missing dependency, you can adjust your README to include apt install whatever.
OK, but how?
Personally, I like Boxes as it gives you a simple choice of VMs - but there are plenty of other Virtual Machine managers out there.
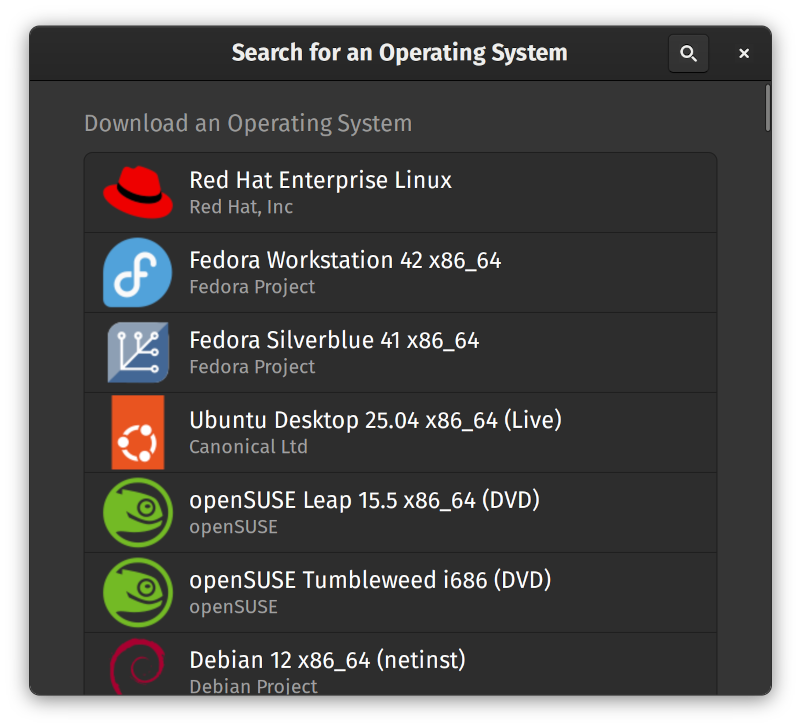
Pick a standard OS that you like. I think the latest Ubuntu Server is pretty lightweight and is a good baseline for what people are likely to have. But feel free to pick something with a GUI or whatever suits your audience.
Once your VM is installed and set up for basic use, take a snapshot.
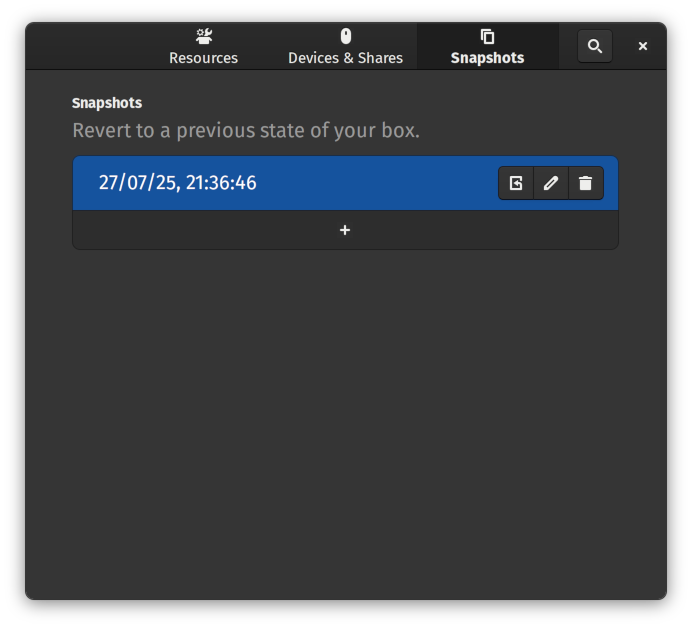
Every time you want to test or re-test a README, revert back to the original state of your box. That way you won't have odd half-installed packages laying about.
Your next step is to think about how much hand-holding do you want to do?
For example, the default Debian doesn't ship with git. Does your README need to tell people to sudo apt install git and then walk them through configuring it so that they can git clone your repo?
Possibly! Who is your audience? If you've created a tool which is likely to be used by newbies who are just getting started with their first Raspberry Pi then, yeah, you probably will need to include that. Why? Because it will save you from receiving a lot of repeated questions and frustrated emails.
OK, but most developers will have gcc installed, right? Maybe! But it doesn't do any harm to include it in a long list of apt get … anyway, does it? Similarly, does everyone know how to upgrade to the very latest npm?
If your software is designed for people who are experienced computer touchers, don't fall into the trap of thinking that they know everything you do. I find it best to assume people are intelligent but not experienced; it doesn't hurt to give slightly too much detail.
The best way to do this is to record everything you do after logging into the blank VM.
- Restore the snapshot.
- Log in.
- Run all the commands you need to get your software working.
- Once done, run
history -w history.txt- That will print out every command you ran.
- Copy that text into your README.
Hey presto! You now have README instructions which have been tested to work. Even on the most bare-bones machine, you can say that your README will allow the user to get started with your software with the minimum amount of head-scratching.
Now, this isn't foolproof. Maybe the user has an ancient operating system running on obsolete hardware which is constantly bombarded by cosmic rays. But at least this way your issues won't be clogged up by people saying their install failed because lib-foobar wasn't available or that ./configure had fatal errors.
A great example is the Opus Codec README. I went into a fresh Ubuntu machine, followed the readme, ran the above history command, and got this:
sudo apt-get install git autoconf automake libtool gcc make
git clone https://gitlab.xiph.org/xiph/opus.git
cd opus
./autogen.sh
./configure
make
sudo make install
Everything worked! There was no missing step or having to dive into another README to figure out how to bind flarg 6.9 with schnorp-unstable.
So that's my plea to you, dear developer friend. Make sure your README contains both the necessary and sufficient information required to install your software. For your sake, as much as mine!
Wait! You didn't follow your own advice!
You're quite right. Feel free to send a pull request to correct this post - as I shall be doing with any unhelpful READMEs I find along the way.
12 thoughts on “How to *actually* test your readme”
@Edent explains why "just bundle/npm install!" has never ever worked for me.
| Reply to original comment on mastodon.social
@blog 💯
I wrote a 10,000-word essay on a modern MAMP localhost setup because I was so tired of barebones instructions that never give enough context because engineers always want to make it *look* easy instead of acknowledging and helping with the parts that aren't.
| Reply to original comment on phpc.social
@linc @blog My experience is that if the CI doesn't scream at me "your instructions no longer work, if they ever did", I won't do it.
And if I tell myself that I should do it anyway, I'll probably stay away from that project because of the anxiety.
So what I'm trying to say is that I really hope there's some clever way to automate this. Like rust doctests - it's documentation, but it's still tested.
| Reply to original comment on genserver.social
@Edent " I find it best to assume people are intelligent but not experienced" - now those are words to live by.
| Reply to original comment on hachyderm.io
Adina
Reading this whole post was worth it JUST to learn about history -w history.txt The rest was also smart and great advice but man, that one trick is definitely going to help me. Thanks!
@Edent
I hate HOWTO videos for the same reason-- rare is the video where they explain what can go wrong and how to tell and what to do about it.
| Reply to original comment on dmv.community
this all the way. I develop inside docker and do my install as a docker file so that its unambiguos and repeatable
| Reply to original comment on bsky.app
I may be a minority audience as well, but there's a level of "I know how to do things in the terminal, but I don't usually compile my own programs" level of Linux user, where I'm trying my best to avoid being rm -rf'd by instructions but not a complete newb.
| Reply to original comment on bsky.app
@blog This is one of the reasons I like Flakes because everything is sandboxed by default. You can clone, build and run one with a single command now and you also don't need NixOS because Flakes will run on any distro and even macOS.
| Reply to original comment on fosstodon.org
Idk run
nix build| Reply to original comment on app.wafrn.net
@blog And now you can automate it, and put it into a flatpack, or bash script, or some other tool, that people can do curl .... and that's all!
| Reply to original comment on mastodon.social
@Edent
I also like to try it on various platforms…install it in a fresh FreeBSD VM/jail. Install it in an OpenBSD VM. Install it on Debian/Ubuntu. Install it on RedHat/CentOS. Install it on Minix. The more places I can test it, the more thorough my README can be.
(and another reason I like #awk and simple C code because versions of awk/gcc/clang/tcc almost never matter to me and they work almost everywhere; though make(1) is a little more temperamental with GNU make, BSD make, imake, cmake, …)
awk
| Reply to original comment on mastodon.bsd.cafe
More comments on Mastodon.